Monday, February 4, 2019

The Beta of Locked Google Forms is Now


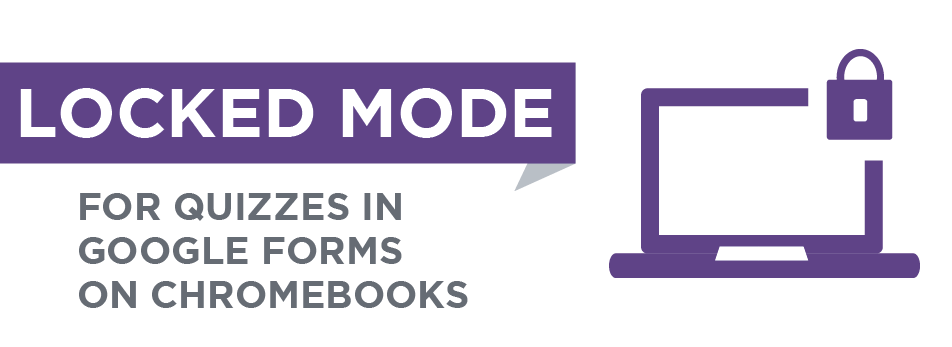
A few months ago Google announced that it will allow us to TRY a feature that will
allow us to assign a google forms quiz in LOCKED mode so students can not surf
the internet during the test.  


At that time I shared how to sign up for the Beta test.  Those directions are here.


For those who have already signed up for the test you should have received an email
notifying you.  If you haven’t then make sure you have put in a work order to
have your outlook email connected to your schoogle fake email so you get notifications.  Directions here


For those ready to move forward here are some are some tips and resources.


1.
Locked Mode Quizzes in Google Forms email from Google
need to make sure your Chromebooks are running the latest operating system, M68, in order
to access this feature. If you have questions about your device management or setup,
please contact your administrator.

Commitment
We ask that you submit feedback through the “Send feedback” button in Forms. In
the case where respondents are able to escape locked mode and open browsers
during quizzes, please send us feedback using this form. We’d like to help resolve
any issues as quickly as possible, so we appreciate the feedback. Additionally,
throughout the pilot we may ask instructors to fill out surveys on their overall
experience with locked mode. We look forward to your participation and the
opportunity to gather your feedback to improve this feature.


2.  You can assign the quiz in google classroom or share a link on wits or wits mail


3. Students cannot right click copy...but they can ctrl+c copy and then past some copied
questions when the quiz is over.  It doesn’t help them but they could share with friends
taking the quiz later.


Notify Google of this and other glitches by using the feedback ? in the lower right or left of the google forms page.


Solution:  If you are worried about this one way to combat it is to break up your quiz
into sections so after every few questions students proceed to another page and can
only copy on page of questions.  


4. An email notification is sent to the teacher if a student opens and closes and
reopens a quiz...like they are checking the questions and then looking up answers.


5. Check out this Locked Quiz.  If you have a district assigned chromebook it will
open in locked mode.  This will NOT work on a desktop. Copy and past the quiz
link and have a student try it with you on their device if you don’t have one.  

If you have any questions as you test out this feature don't hesitate to email me.

Enjoy your Life!

Larry

Friday, January 11, 2019

A Fresh New Look and features for Google Classroom


Stay organized in 2019 with new features in Classroom

    Google is constantly improving their education products to make them easier for us to connect with students in the ways we want.  While they have announced a delay in releasing secure testing in google forms they have nonetheless released a few updates to google classroom
    If you have not used google classroom much or have not mastered the big changes that happened at the beginning of the year (Classwork page, materials handout, topics) then I recommend you visit the First day of Classroom training page here.
If you are ready for the newest updates and my comments...read on.
Google Updates:
  • A New Look and themes
  • Drag and Drop Topics and assignments
  •   To Do Tab

A fresh new look for Classroom

Just head to the homepage of classwork.google.com and you will notice a big...almost shocking difference.
Here what it looks like:


If the stark white background and edging bothers your or your student's eyes try one of the following:
  • Screen Shader - a Chrome extension that allows you to pick the color and intensity of the background on a webpage
  • Chromebook Accessibility settings include a high contrast mode.  Click the clock and look for the accessibility icon.
    As part of this new look Google Classroom also added some fresh new color and picture themes to dress up your Chem Period 1, 2 and 4 differently.   

Lastly, every classroom has an easy to access code button on the home Stream so you can project from there instead of going to setting and a drop down description of the class.

Drag and Drop Assignment

If you have used the new classwork page you probably have wanted and maybe even requested from Google the ability to drag and drop your topics and assignments to reorder them.  

Wait no longer.


To Do Button

   Ok, you caught me.  This isn't new but if you aren't using it and teaching your students about it you are missing out.  Both Students and Teachers have a To-Do button.


You have 2 views of work on the To-do page:
  • To Review—Work not turned in or not graded—listed without a due date or as work in progress (work you assigned with a due date)
  • Reviewed—Work that you graded and returned
You can also see these details:
  • Turned in—The number of students who submitted work
  • Assigned—The number of students who didn't submit work
  • Graded—The number of the students whose work you graded and returned
Note: You can filter both tabs by class to view only the work for a class.
That was a bunch today...so take the weekend off and get at it on Monday.

Enjoy your Life!


Friday, November 30, 2018

ReWordify - Making tough to read text accessible to all students

Rewordify is a website that automagically rephrases hard to understand text and creates various learning activities to build reading comprehension. The first three teachers I showed Rewordify.com to had these reactions:  
  • "I need this for a lesson tomorrow"
  • "OMG, you don't know how you just saved me hours"
  • "That's nice"  -- It's not for everyone.


So that is the pitch of the site, created by a teacher, and eschewing {ahem: avoiding...according to rewordify} corporate influence or even the freemium model.  All Free...forever.

What does Rewordify do?

  • Rewordify.com intelligently simplifies difficult English text (link)
  • It recognizes over 58,000 difficult words and phrases, and changes them to simpler versions for better understanding and comprehension based on context 
  • You can change the difficulty level of the words that are simplified, and the way that the site rewords text, in dozens of different ways via the "Settings" page.
  • The site has a huge library of most pieces of classic literature that can be simplified as needed
  • The site dynamically teaches students vocabulary based on any block of text via Learning Sessions, which continuously checks for understanding and reteaches until mastery is reached.
  • You can create free vocabulary lists, quizzes, and other vocabulary learning materials for any block of text you paste into the site.
  • If you want to track your students the free Educator Central feature package lets educators create student accounts, create assignments, and easily monitor their students' reading and learning.


Who is Rewordify for?

  • Anyone that uses text to provide content to students.
  • Students needing extra help
  • English Language Learners
  • Students struggling with vocabulary
  • Teachers that would like to create printable vocabulary practice and quizzes

Follow this link to see the demo and get started.

Enjoy your life!

Tuesday, October 23, 2018

Team Drives in Google Drive

Image result for team drives g suite

Team Drives is now turned on in our G Suite for Education Accounts

What is Team Drives?

Team Drives is a shared space where teams can easily store, search, and access their files anywhere, from any device. Unlike files in My Drive, files in a Team Drive belong to the team instead of an individual.

How is Team Drives different from M: drive or other shared drives?

  1. Created and administered by anyone given access 
  2. All documents are "owned" collectively
  3. Changes to files are changed for everyone


Why create a team drive?

  1. Share files relevant to most or all of a department, team or collaborative group (co-teachers, colleagues teaching the same class, etc.)
  2. Organize files with a consistent theme.

Get Started:  Go to drive and right click on Team Drives

Set Permissions:  Right click on the name of the drive you created


Caveats:  

  • Once a document is placed in Team Drives...it is owned by the group.  Make a copy of a personal file before placing in Team Drives
  • Certain files types like google maps cannot be stored in Team Drives
  • Team Drives is NOT turned on for students.  In most cases, you can create a folder in My Drive and share it with students, giving them either edit or view only access.
Follow this link for more tutorials on Team Drives

Friday, October 5, 2018

Using your Keyboard: The Windows Flag Key

Using your Keyboard:  The Windows Flag Key


Image result for windows key

Here are a few Windows Key Shortcuts that will save you a few clicks.


  1. Windows Key + D = Display Desktop - no need to minimize each window one by one or use the desktop button next to the date and time...just Window + D


2.  Windows Key + W = Show Windows Ink Options - This allows you to DRAW on a whiteboard or a screenshot of your computer without special software like Smart Notebook.  You can also click on the ink pen in your toolbar tray (right click to make sure it is on)


Final Friday Sendoff...

3.  Windows Key + L = Lockout - no more Ctrl + Alt + Delete + enter or click to lock your computer.

For a full list of Windows key shortcuts....


Enjoy your life!


Monday, September 17, 2018

Transit Dashboard and Google Classroom Updates


Today's Tips involve the Transit Dashboard and Google Classroom

The Transit Dashboard is a weblink that contains documents sent out to all staff through email...all in one place.   Documents like the School Calendar, meeting schedules and tech tips.

To get the most use out of the TMS Dashboard, bookmark it in your browser or create a shortcut on your phone's home screen for quick access.

TMS Dashboard

If there are documents you think should be on the site, upload them to Google and share with Amy Girling and Larry Goble with a note about the TMS Dashboard.  

Image result for google classroom


As you have started your year you may have noticed that Google Classroom has changed quite a bit.  If you haven't figured out the where to put stuff or why it is better here is a brief list and a presentation if you want more details.

Google Classroom updates:

  • New Classwork  and Stream Tab: Use the Stream tab sparingly for announcements or class discussions...commenting back and forth.  Use the Classwork tab to post all assignments, materials and organize in topics

  • Topics: In the classwork page you should 99% of the time use a topic.  These topics are like Unit headers and will keep all your assignments/questions/material for that unit together.  You can change the order of the topics and the order of the posts within each topic.  Anything you don't assign to a topic will live at the top and annoy you.

  • No About Tab:  We previously used the about tab to post static information and get the class code and add teachers.

  • Classcode and Co-teachers: In the Settings gear

  • Materials posting option: Along with assignment and question you can also post a material.  Use this when you are handing out a view only doc that isn't connected to a grade or comment.  Those things like a syllabus that you used to post in the ABOUT tab can be posted as Materials in the Classwork tab without a topic and they will stay at the top of the stream for easy access.

  • Grading Frame: When opening a students assignment for commenting/grading google classroom will default open it in a special Grading Frame.  In this frame you can see the student doc, comment, assign a grade and click an arrow to see the next students doc.  This is much more convenient than opening and closing multiple files and having different places to comment and assign the grade.
There are a few more subtle changes covered in the slides below but those are the major ones.  As always...those are my tips...but I have been wrong before.

Let me know if you need anything.  


Google Classroom Updates

Image result for google classroom
As you have started your year you may have noticed that Google Classroom has changed quite a bit.  If you haven't figured out the where to put stuff or why it is better here is a brief list and a presentation if you want more details.

Google Classroom updates:

  • New Classwork  and Stream Tab: Use the Stream tab sparingly for announcements or class discussions...commenting back and forth.  Use the Classwork tab to post all assignments, materials and organize in topics

  • Topics: In the classwork page you should 99% of the time use a topic.  These topics are like Unit headers and will keep all your assignments/questions/material for that unit together.  You can change the order of the topics and the order of the posts within each topic.  Anything you don't assign to a topic will live at the top and annoy you.

  • No About Tab:  We previously used the about tab to post static information and get the class code and add teachers.

  • Classcode and Co-teachers: In the Settings gear

  • Materials posting option: Along with assignment and question you can also post a material.  Use this when you are handing out a view only doc that isn't connected to a grade or comment.  Those things like a syllabus that you used to post in the ABOUT tab can be posted as Materials in the Classwork tab without a topic and they will stay at the top of the stream for easy access.

  • Grading Frame: When opening a students assignment for commenting/grading google classroom will default open it in a special Grading Frame.  In this frame you can see the student doc, comment, assign a grade and click an arrow to see the next students doc.  This is much more convenient than opening and closing multiple files and having different places to comment and assign the grade.
There are a few more subtle changes covered in the slides below but those are the major ones.  As always...those are my tips...but I have been wrong before.

Let me know if you need anything.