Take It Up a Notch: Aggregating Student Video Projects for Teacher and Peer Feedback on Youtube

Students are immersed in a culture of video. Youtube attracts more eyeballs than ANY cable station. Watching educational videos is one way to deliver content, but having students create videos on your class content "deepens thinking" and engages them much more than consuming video. But then what?
 Getting videos to the teacher is relatively easy in Google Classroom. However, at times we want all the videos in one easy place for teachers and students to comment on. The simple answer for this is to use your G Suite for Education account to post on Youtube. Students can place their videos in a playlist that the teacher creates and the class shares. Here is how:
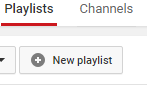
Choose to create a new playlist, name it and choose Unlisted for the privacy setting. This way your playlist cannot be found by search, but students can find it with the link.
Next, Click on the Share settings and check the “Allow people with link to add videos”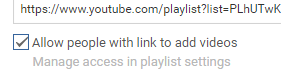
As with most things...the first time is slightly more complicated than the second. The first time students should log in with their school google login (schoogle) and go to their Youtube account and choose “My Channel”. They will then have to set up their name and gender and create the channel. After that, students can follow the link you posted to your playlist. When they press  continue they will be able to upload their own video. If they are on a chromebook and the video is on Google Drive the process is simple...press “Add Videos” while in the playlist. Similarly if the students are working on a pc...the video must first be downloaded to the pc and then uploaded, unless your students’ videos are syncing with Google Photos. Ahhh...the options are endless.
Students and teachers alike now have access to view and comment on any video that has been added to the playlist. 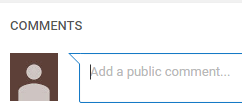
Once the videos are all in, access to add videos can be restricted and the playlist shared with parents, the school or the world for critical feedback and celebration.
Much Thanks to Eileen Theuerkauf and Jennifer Murphy for editing this post.

No comments:
Post a Comment